最強ぷよAIの開発環境を Windows 上に構築する方法
0. 目次
1. はじめに
2. VirtualBox、Vagrant のインストール
3. VirtualBox + Vagrant で Ubuntu の仮想環境を構築
4. Ubuntu 環境のセットアップ
5. ぷよAIの実行
6. 次回以降に仮想環境を起動してぷよAIを実行する手順まとめ
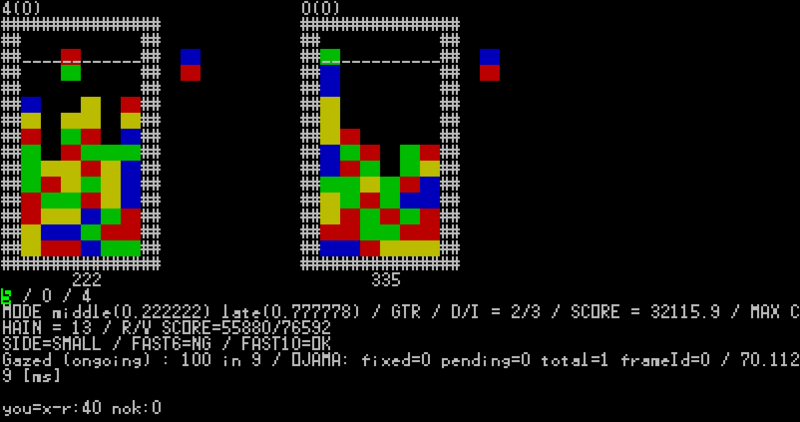
最強ぷよAIの実行例
1. はじめに
mayahさん @mayah_puyo が製作中でソースが公開されている「最強ぷよAI」の開発環境・動作環境を自分の Windows 8 上に構築できたので、その手順をまとめた。mayahさんは今年(2015年)中に人間の最強プレイヤーを倒せるAIを作ることを目標に掲げていて現在開発協力者を募集されているので、「C++ は使えるしアルゴリズムを考えるのも好きだけど、Linux 環境がよく分からない」という人を引き込む助けになればと思っている。開発協力できるほどプログラミングに自信がないという人でも、ぷよAIに興味があるなら動作環境を作って遊んでみるだけでも面白いのではないかと思う。
最強ぷよAIのソース(github)
mayahさんによる開発協力者募集のツイート
7月4日(土)にはアーケード版ぷよぷよ通で人間とAIが対戦するイベントも予定されている。
ACぷよぷよ通 第1回 人類 VS AI 対抗戦
以下、構築手順の詳細。
2. VirtualBox、Vagrant のインストール
mayahさんのぷよAIは Linux 上で動作するため、Windows 上で開発するためには仮想環境を作成するといい(ただし、Windows のバージョンやPCのCPUが古いとぷよAIが正常に動作しない可能性がある)。今回は VirtualBox + Vagrant で Ubuntu の仮想環境を作成する。
まず VirtualBox、次に Vagrant の順にインストールする(詳細設定は省略。基本的にデフォルトのままでいい)。
2.1. VirtualBox のインストール
ダウンロード
Downloads – Oracle VM VirtualBox
https://www.virtualbox.org/wiki/Downloads
「VirtualBox 4.3.28 for Windows hosts」から
インストール
VirtualBox-4.3.28-100309-Win.exe (最新版)を実行
2.2. Vagrant のインストール
ダウンロード
Download Vagrant
https://www.vagrantup.com/downloads.html
「WINDOWS Universal (32 and 64-bit)」から
インストール
インストール先は「C:\Vagrant\」とした。インストール完了後にPCを再起動する。
3. VirtualBox + Vagrant で Ubuntu の仮想環境を構築
コマンドプロンプトで Vagrant のコマンドを実行することで仮想環境を構築できる。
3.1. Vagrant のバージョンを確認
Vagrant が正しくインストールされていることを確認する。
コマンド
vagrant -v
実行結果
Vagrant 1.7.2

3.2. Ubuntu のBoxをインストール
Vagrant ではOSイメージのことをBoxと呼ぶ。
コマンド
vagrant box add ubuntu/trusty64
実行結果
==> box: Loading metadata for box 'ubuntu/trusty64'
    box: URL: https://atlas.hashicorp.com/ubuntu/trusty64
==> box: Adding box 'ubuntu/trusty64' (v20150608.0.0) for provider: virtualbox
    box: Downloading: https://atlas.hashicorp.com/ubuntu/boxes/trusty64/versions
/20150608.0.0/providers/virtualbox.box
    box: Progress: 100% (Rate: 5676k/s, Estimated time remaining: --:--:--)
==> box: Successfully added box 'ubuntu/trusty64' (v20150608.0.0) for 'virtualbo
x'!

※Ubuntu のBox名に ubuntu/trusty64 以外を指定すると、ぷよAIが正常に動作しない可能性がある。
3.3. Boxが正しくインストールされているか確認
コマンド
vagrant box list
実行結果
ubuntu/trusty64 (virtualbox, 20150608.0.0)

3.4. ホスト用のフォルダを作成して移動
ホスト用のフォルダを「C:\Vagrant\puyoai」とする。
コマンド
mkdir C:\Vagrant\puyoai
cd C:\Vagrant\puyoai

3.5. Ubuntu の仮想環境を初期化
コマンド
vagrant init ubuntu/trusty64
実行結果
A `Vagrantfile` has been placed in this directory. You are now
ready to `vagrant up` your first virtual environment! Please read
the comments in the Vagrantfile as well as documentation on
`vagrantup.com` for more information on using Vagrant.

これにより、ホスト用のフォルダ(C:\Vagrant\puyoai)に Vagrantfile というファイルが作成される。Vagrantfile には仮想環境の構成が記述されている。
3.6. Vagrantfile の設定変更
Vagrantfile をテキストエディタで開く。
ネットワーク設定
29行目あたりにある下記の行のコメントをはずしてIPアドレスを設定する(IPアドレスはそのままでもいい)。設定したIPアドレスで仮想環境にアクセスできるようになる。
変更前
# config.vm.network "private_network", ip: "192.168.33.10"
変更後
config.vm.network "private_network", ip: "192.168.33.10"
プロバイダの設定
46~52行目あたりにある下記の内容を有効にする(これがないと後の vagrant up で失敗した)。
変更前
  # config.vm.provider "virtualbox" do |vb|
  #   # Display the VirtualBox GUI when booting the machine
  #   vb.gui = true
  #
  #   # Customize the amount of memory on the VM:
  #   vb.memory = "1024"
  # end
変更後
  config.vm.provider "virtualbox" do |vb|
    vb.gui = true
  end
vb.memory の値は必要であれば設定する。
3.7. PCの仮想化支援機能の有効化
この項はひとまず飛ばして次に進んでいい。次項の「vagrant up」を実行したときに途中で「ホストマシンの仮想化支援機能(VT-x/AMD-V)が使用できません」といったエラーメッセージが出て失敗したら、PCを再起動してBIOS設定で仮想化支援機能を有効にする。自分のPC(ヒューレット・パッカードのノートPC)では、PC起動中にF10キーを押してBIOS設定画面に入り、[Virtualization Technology] の設定が Disabled になっていたのを Enabled に変更した。
参考:vagrant up起動に失敗したら
3.8. Ubuntu の仮想環境を起動
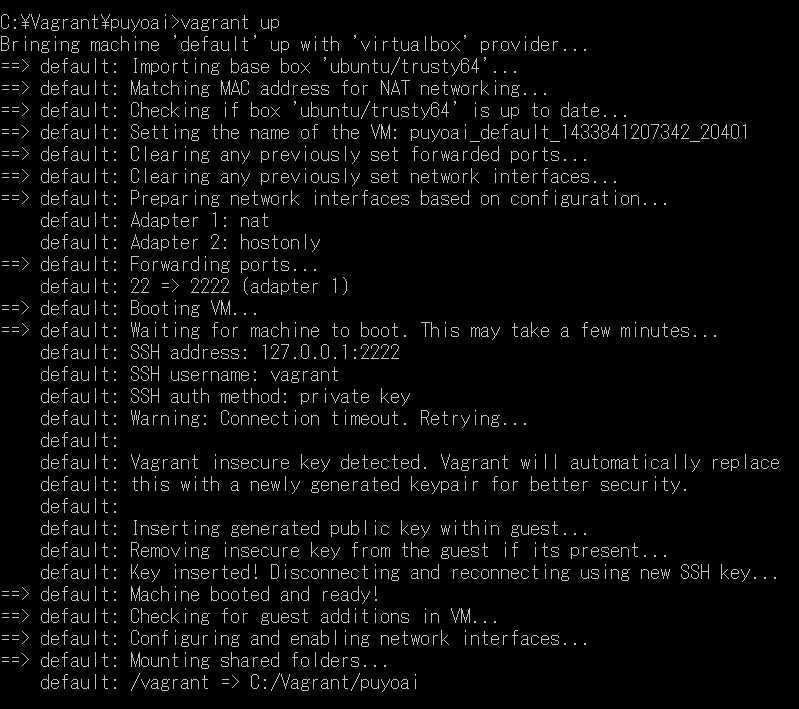
「vagrant up」コマンドを実行すると、ホスト用のフォルダ(C:\Vagrant\puyoai)に「.vagrant」というフォルダが作成され、VirtualBox 上で Ubuntu の仮想環境が起動する。Vagrantfile で「vb.gui = true」の設定をしている場合、VirtualBox のウィンドウが起動する。
コマンド
vagrant up
実行結果
Bringing machine 'default' up with 'virtualbox' provider...
==> default: Importing base box 'ubuntu/trusty64'...
==> default: Matching MAC address for NAT networking...
==> default: Checking if box 'ubuntu/trusty64' is up to date...
==> default: Setting the name of the VM: puyoai_default_1433841207342_20401
==> default: Clearing any previously set forwarded ports...
==> default: Clearing any previously set network interfaces...
==> default: Preparing network interfaces based on configuration...
    default: Adapter 1: nat
    default: Adapter 2: hostonly
==> default: Forwarding ports...
    default: 22 => 2222 (adapter 1)
==> default: Booting VM...
==> default: Waiting for machine to boot. This may take a few minutes...
    default: SSH address: 127.0.0.1:2222
    default: SSH username: vagrant
    default: SSH auth method: private key
    default: Warning: Connection timeout. Retrying...
    default:
    default: Vagrant insecure key detected. Vagrant will automatically replace
    default: this with a newly generated keypair for better security.
    default:
    default: Inserting generated public key within guest...
    default: Removing insecure key from the guest if its present...
    default: Key inserted! Disconnecting and reconnecting using new SSH key...
==> default: Machine booted and ready!
==> default: Checking for guest additions in VM...
==> default: Configuring and enabling network interfaces...
==> default: Mounting shared folders...
    default: /vagrant => C:/Vagrant/puyoai
3.9. 仮想環境のシャットダウン
仮想環境をシャットダウンするときのコマンド。これから Ubuntu 環境をセットアップするなら今は実行しなくていい。
コマンド
vagrant halt
実行結果
==> default: Attempting graceful shutdown of VM...

4. Ubuntu 環境のセットアップ
4.1. Ubuntu 環境へのSSH接続
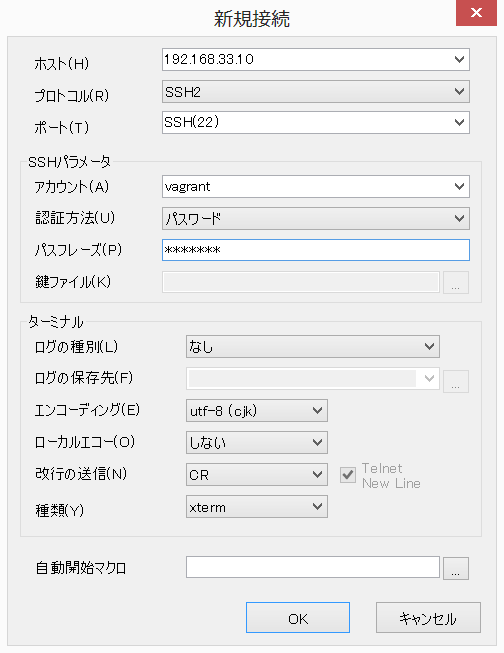
Poderosa、Putty、Tera Term 等のSSHクライアントを使用して、以下の設定で Ubuntu 環境にSSH接続する(SSHクライアントの説明は省略)。
ホスト:192.168.33.10 (Vagrantfile で設定したIPアドレス)
ポート:22
アカウント:vagrant
パスワード:vagrant
Poderosaでの接続設定画面
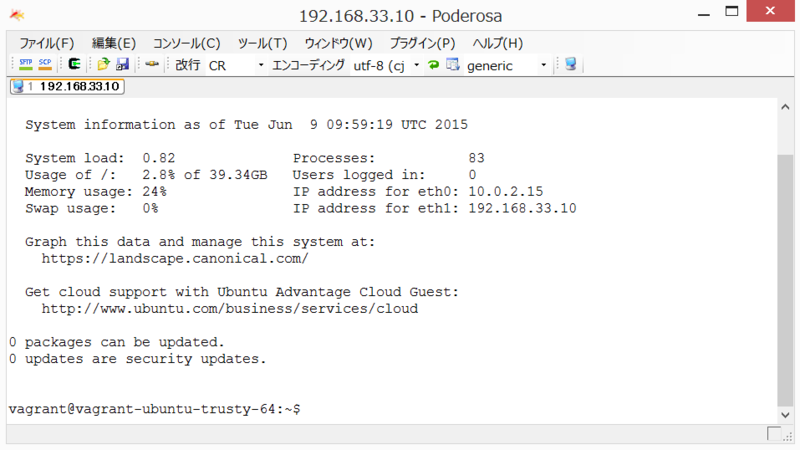
Poderosaでログインした直後の状態(ログイン直後は /home/vagrant にいる)
4.2. ライブラリのインストール
ぷよAIで使用するライブラリをインストールする。
コマンド
sudo apt-get -y install git clang cmake
sudo apt-get -y install libgoogle-glog-dev libgflags-dev
sudo apt-get -y install libsdl2-dev libsdl2-ttf-dev libsdl2-image-dev
sudo apt-get -y install libmicrohttpd-dev
sudo apt-get -y install libffms2-dev libusb-dev libcrypto++-dev
sudo apt-get -y install ninja-build
実行結果
(省略)
4.3. 共有フォルダの中に開発用フォルダを作成して移動
ホスト用のフォルダ(C:\Vagrant\puyoai)が仮想環境の /vagrant で共有されている。
コマンド
mkdir -p /vagrant/dev
cd /vagrant/dev

4.4. gitでぷよAIのソース取得
コマンド
git clone https://github.com/puyoai/puyoai.git
実行結果
Cloning into 'puyoai'...
remote: Counting objects: 19772, done.
remote: Compressing objects: 100% (24/24), done.
remote: Total 19772 (delta 9), reused 0 (delta 0), pack-reused 19748
Receiving objects: 100% (19772/19772), 390.49 MiB | 2.39 MiB/s, done.
Resolving deltas: 100% (14633/14633), done.
Checking connectivity... done.
Killedng out files:  98% (2199/2240)

/vagrant/dev/puyoai(C:\Vagrant\puyoai\dev\puyoai)にソースが取得される。
5. ぷよAIの実行
5.1. ぷよAIのビルドを実行
/vagrant/dev/puyoai の中に out ディレクトリを作り、その中でビルドを行う。
コマンド
ディレクトリの作成・移動
cd puyoai
mkdir -p out/Default
cd out/Default
ビルド
cmake ../../src
make
テスト
make test
実行結果
(省略)
5.2. ぷよAIのプログラムを実行
puyoai/out/Default/cpu の中にあるAIをふたつ指定して対戦処理を実行できる。実行オプションで --use_cui を指定すると対戦フィールドがテキストで表示される(仮想環境で実行する場合は必ず付けておくといい)。
中断したい場合は [Ctrl] + [C] 。
コマンド
./duel/duel --use_cui ./cpu/sample/sample ./cpu/sample_rensa/sample_rensa
実行結果
Poderosa 上での表示
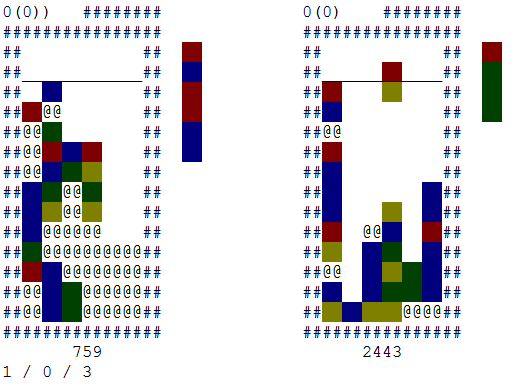
「1 / 0 / 3」の表示は左から「1Pの勝ち」「引き分け」「2Pの勝ち」の回数。
実行オプションで --realtime=false を指定すると対戦が高速に進む。
コマンド(mayah VS niina を高速に実行)
./duel/duel --use_cui --realtime=false ./cpu/mayah/run.sh ./cpu/test_lockit/nidub.sh
sample、sample_rensa ではCPUのバイナリを直接指定しているが、mayah、niina(test_lockit) ではshファイルを指定する。
実行結果

対戦実行時のログは /tmp に出力されている。
5.3. duelの便利な実行オプション
--use_cui
対戦フィールドがテキストで表示される。
--realtime=false
対戦が高速に進む。
--num_duel=○
「○本勝負」の指定。
--num_win=○
「○本先取」の指定。
--use_even=false
時間経過による引き分けをなくす(デフォルトでは対戦開始から2分が経過したら引き分けになる)。
6. 次回以降に仮想環境を起動してぷよAIを実行する手順まとめ
cd C:\Vagrant\puyoai
vagrant up
Ubuntuで実行
ディレクトリの移動
cd /vagrant/dev/puyoai/out/Default
ぷよAIのビルド
cmake ../../src
make
ぷよAIの実行
./duel/duel --use_cui ./cpu/mayah/run.sh ./cpu/test_lockit/nidub.sh